Kitchen Stand Mixers can be a pricey addition for any kitchen. Especially if you don’t think you cook much. I’ve been cooking since I didn’t know well enough not to put a raw egg into a sifter (read about my first cooking lesson)! So it’s a lifelong activity.
Why do you need a stand mixer?
- Even if you don’t think you cook, do you like to whip up a batch of cookies now and then?
- Have a special birthday to celebrate?
- Need to put a quick bread together for a Saturday girl’s brunch and mimosas? (I use that example because I’ve been there).

But I have a hand mixer!
I do, too! I have two hand mixers, and I do pull them out to beat an egg, or when I’m feeling lazy and don’t want to whisk something until my arm feels like it’s going to drop off! But there’s nothing like the smell of an overheating motor on a hand mixer. If you’ve had it happen once, you won’t forget it. Recently I pulled out my favorite little one to whip up some fresh salad dressing. I had to blow the dust off it first, and wash the beaters. It had been sitting in that cabinet for quite a while. As soon as I turned it on, I could smell that heated egg smell, and the mixer handle heated up in my hand. I had to do the Marie Kondo thing and thank that little mixer for all it had done for me. But then it went in the trash. Thankfully, I do have a stand mixer, so I pulled it out and quickly finished my vinaigrette.
But a hand mixer is so much less expensive!
If you’re building in a wedding registry or want to splurge on a special gift for yourself, this is the perfect item. I know for our wedding registry we put fun things like a full set of bar glasses (wines, old fashioneds, in the dozens!) plus cushions for our kayaks, and fancy lights for our deck. But we already had two stand mixers. If we didn’t I can guarantee you this would have been on our list. I promise, it’ll be useful now, and for years to come.
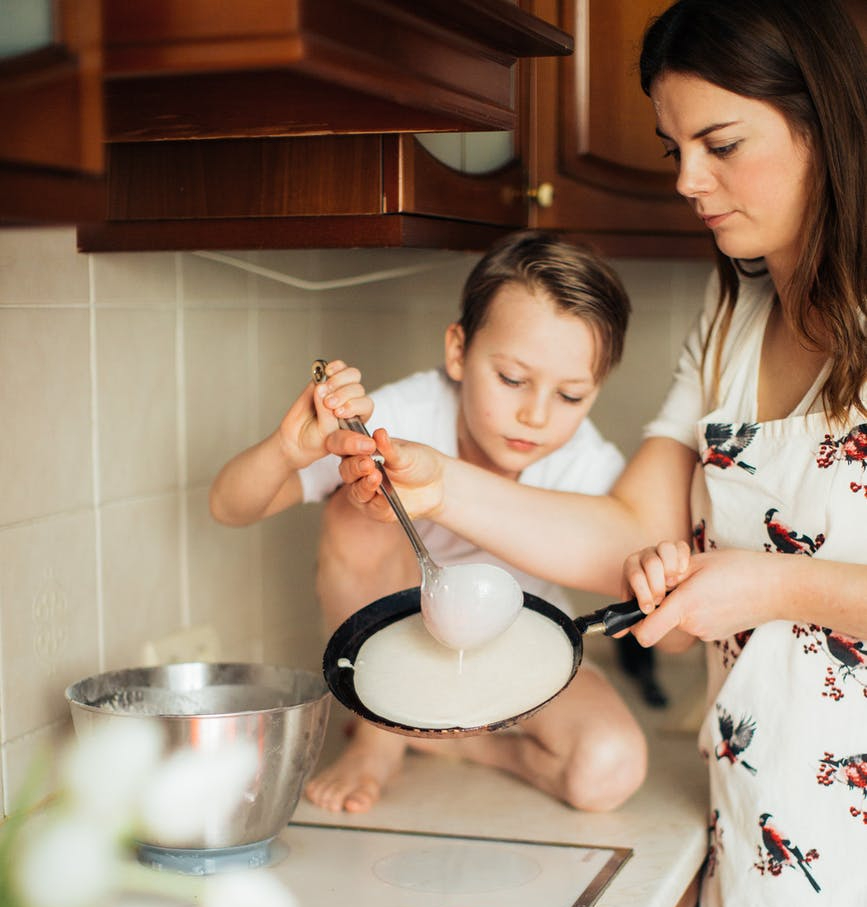
And if you’ve decided that it’s finally time to teach your son or daughter how to make bread, or bake a cake, or even make pasta! A stand mixer is going to be your friend. I bought one when I got my first house back around 1993. I still have that stand mixer 17 years later, and it still works great. When my wife and I merged houses, we ended up with a second mixer and sold it to a friend. Whether you’re whipping cream, mixing a cake, making holiday cookies once a year, making the creamiest lump-free mashed potatoes, or want to make your own sausages or pasta (yes there are attachments for that!), you need a stand mixer that can stand up to heavy usage and will keep on going. Unlike coffee makers, these days that cost a couple hundred dollars, get used daily, but die an untimely death exactly when the warranty runs out 12 months later, a mixer needs to be reliable.
These are my recommendations both from my own experience, as well as research available from both Good Housekeeping and Consumer Reports as well as Everythingkitchens.com.
Recommended Stand Mixers Priced Low to High
Hamilton Beach Eclectrics Retro Look. (price range $200)
- 4.5 qt stainless bowl
- 19.8 pounds
- Flat beater, dough hook, wire whisk, pouring shield
- No additional attachments
If budget is an issue or you feel you just can’t spend hundreds of dollars because you think you’ll only use a mixer once or twice a year, this would be a good choice. It has a fun appearance so you won’t mind it sitting on your counter, is lightweight enough to move easily, and can do the job including mixing multiple batches of cookies at a time. It may bounce around a bit due to its weight if you’re working a heavy or chunky dough, but for whipping, mixing and whisking.
Also, Consumer Reports rates it #1 Quietest Mixer in a comparison of mixers. Reviews run the gamut but most people seem to be happy with this one if they’re looking for an inexpensive model that can handle a good amount of use. Most compare it to Kitchen-Aid and after using, feel that it is comparable in results if a bit bouncy due to it’s lighter weight.
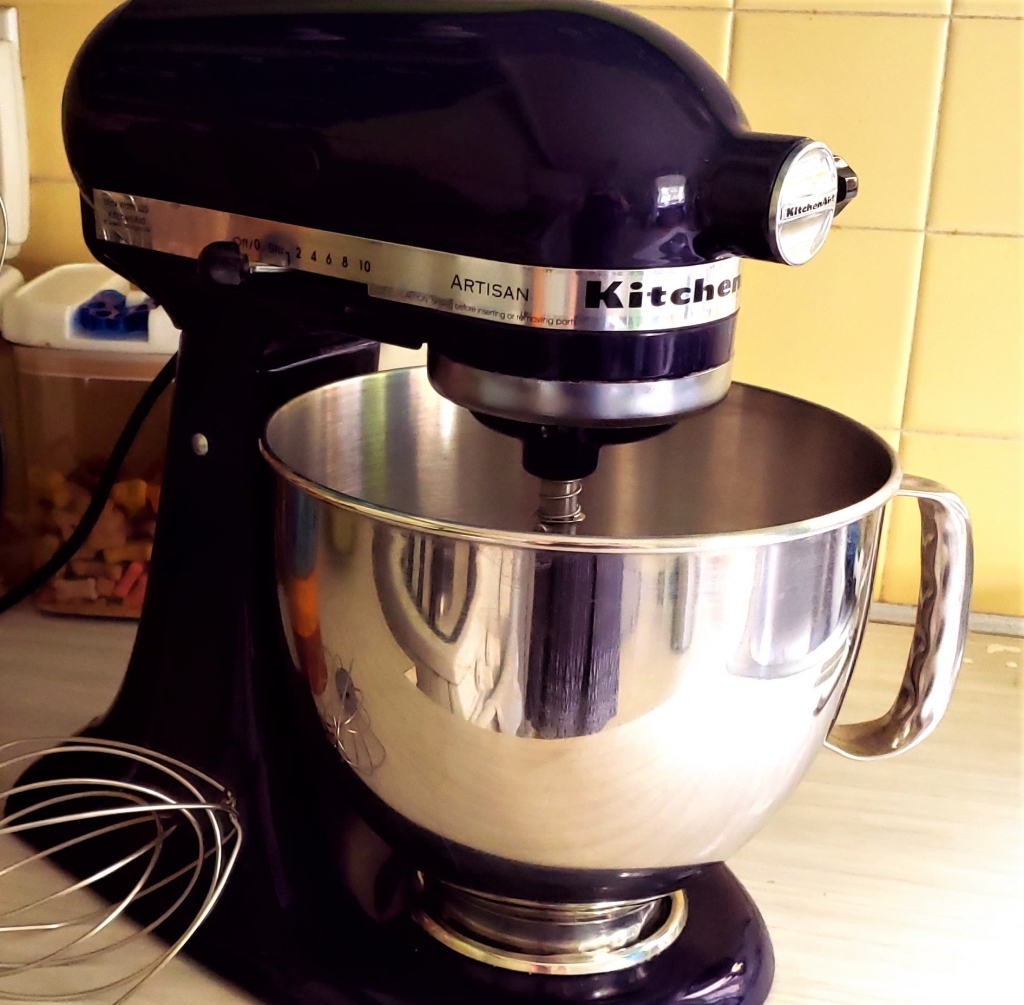
Kitchen aid Artisan ($350 – $450)
- 5 qt stainless bowl
- 24 pounds
- Attachments: flat beater, dough hook, wire whisk, pouring shield. It also has 42 additional available attachments. (pasta attachments, food processor attachments, slicer/shredder, grinder, mixer sifter, scale, juicer, vegetable sheet cutter, grain mill, varied mixer bowls, dough hooks, whisks, beaters, sifter, ice cream maker, corer and more!) And you can use any KitchenAid power attachment with it even if it was made decades ago!)
This model was deemed #1 Best overall by Good Housekeeping.
Important to note: Some tests have found that the Artisan can’t handle large amounts of dough (8 or more loaves of bread at once) and recommend the Professional model if you’re doing that level of cooking. Also, the tilt-head is obstructed, meaning you have to stop the motor and lift the head to add ingredients. The pour shield attachment prevents most of the splash of liquid or poof of flour, but there may be more cleanup than with an unobstructed tilt-head. Interestingly, the Professional model was rated #3 by Good Housekeeping, weighs 31 pounds, has a 6 qt glass bowl, and offers a bowl lift mechanism to raise and lower the bowl to the beaters.
A very personal and unique gift
Considering this as a gift? You can even have your Kitchen aid engraved, and select from 15 different bowl designs, and over 40 color options.

SMEG Retro Stand mixer (Price range $450 – $650)
- 5 Qt stainless bowl
- 26 pounds
- 5 attachments (grater, slicer, flat beater, pouring shield, wire whisk)
- No additional attachments
Scores low on the egg white small amount whip (the wire whisk whip doesn’t reach far enough down into the bowl) but high ratings on large batches of cookies, and pizza/bread dough
Can bang around a bit if you’re mixing chunky cookie dough or thick bread dough (oatmeal, nut/seed based), but the weight of the machine makes this a rare occurrence unless you’re mixing a large amount of dough.
SMEG is made in Italy and is likened to an Italian race car when it comes to speed options and the transition from low to higher speeds.

I’m a Kitchen Aid Gal
I’m biased since I’ve had a Kitchen Aid mixer since way back when. My mother got one as a wedding gift in the 50s and we used it for bread, muffins, cake, frosting, and so much more. If you’re looking to do more than just mix, go with the Kitchen Aid. You can make pasta, grind your own flour, slice and spiral cut veggies, make ice cream. It’s basically the one-man band of the mixer world.
If you’re on a budget but still want a machine that can handle a good amount of use and more than a single batch of cookies, go for the Hamilton Beach, and if you want the kitschy retro look, a heavy-duty machine, and have the money, the SMEG will provide you with high end mixing power that looks good while it’s doing the work.
So now that you’ve got your mixer, let’s give it a test drive with this amazing mocha cake, my version of a recipe from Bon Appetit.
High Speed Moco-Coco Cake
Ingredients
- 2 Cups Cake Flour (see instructions below on how to make cake flour out of all-purpose flour)
- ¾ cup unsweetened cocoa powder
- 1 ½ tsp baking soda
- ¾ tsp salt
- 1 ½ sticks unsalted butter, room temperature
- 2 cups medium brown sugar
- 3 eggs
- 1 tsp vanilla extract
- ½ tsp coconut extract
- 1 cup buttermilk
- 4 tsp espresso powder in ¾ cup hot water

Moco-Coco Frosting
- 1/3 cup unsweetened cocoa powder
- 1 TB espresso powder
- 1 TB Coconut Liqueur, or 2 tsp coconut extract
- 1 ½ cups whipping cream
- 1 1/3 cups sugar
- 2 8-oz containers mascarpone cheese
- Chocolate covered espresso beans
Instructions:
- Preheat oven to 325 degrees F. Butter and flour 2 9-inch cake pans. Line bottom of pans with parchment paper.Sift together flour, cocoa, baking soda, and salt into a medium bowl
- Beat butter in large bowl until smooth.
- Add brown sugar to butter and beat until blended (2 minutes)
- Add eggs one at a time, beating after each until well blended
- Mix in vanilla and coconut extract.
- Alternate flour mixture with buttermilk, beating into the butter mixture thoroughly after each addition.
- Slowly add in espresso/water mixture beating until just smooth.
- Pour batter into two pans. Bake about 40 minutes, until a toothpick inserted into the center comes out clean.
- Cook on a rack for 15 minutes then loosen edges with a knife. Invert onto a wire rack and allow to cool completely.
Frosting Instructions
- Sift cocoa powder into a large bowl. Stir in espresso powder.
- Bring one cup of the cream to a boil in a small pan. Slowly pour over the cocoa mixture, whisking until completely dissolved.
- Add the remaining half cup of cream, coconut liqueur, and the sugar, and stir until dissolved.
- Chill the mixture at least 2 hours
- Add mascarpone to cocoa mixture and beat on low until smooth. Increase speed, and beat until thick and the mixture forms medium-firm peaks (about 2 minutes). Be careful not to overbeat as the mixture will turn to butter!
- Frost the cake, using a light coating at first to get both layers set and covered, chill the cake and the frosting, then spread remaining frosting. You can use a special frosting knife to create designs, or a frosting bag to pipe frosting on. Decorate with chocolate-covered espresso beans. Chill again. Allow to return to room temperature before serving.
Yum!!!! Makes me want to go make a cake now!!!
Quick Tip for making cake flour out of all-purpose flour:
The difference between cake flour and all-purpose flour is that cake flour is lower protein and has less gluten. By removing 2 TB of all-purpose flour from 1 cup, and adding 2 TB of corn starch and mixing well, you’ll have 1 cup of cake flour. The corn starch inhibits the formation of gluten. Just make sure to sift the two together well before using.
- Lentil and Sausage Soup with Mushrooms
- Biscottis forever!
- Rosemary Garlic Buttermilk Bread
- Apple Cake with Cider Whiskey Glaze
- I’m Back! With Shakshuka and cooking videos!

